A Step-by-Step Guide to Flat Roof Installation for Commercial Properties
Flat roofs have become very popular in modern commercial buildings. Mainly levelling roof installation is an important work that demands special attention and the right technique. Installing these roofs correctly offers many benefits to the building. Flat roofs not only make better use of the space but are also easier to maintain.
The work of roof installation is completed in several stages and every step is important. The right scheme and selection of materials is the key to the success of this work. In this article, we will understand every step of flat roof installation in detail. This information will help you in better roof installation.

1. Ceiling planning and preparation
First, it is necessary to inspect the roof site. For this, a team of experts is formed. This team consists of engineers, architects and construction experts. They assess the slope, drainage, and material needs of the roof.
Weather conditions are also considered in the roof plan. Correct measurements and roof maps are prepared. A list of safety devices and building materials is made. All necessary permits and approvals are also obtained at this stage. Future needs are also considered in the roof plan. Space is left for solar panels or additional equipment. Special plans are made for emergency situations. Safety training is given to all the working people.
2. Material selection and purchase
Choosing the right material for the roof is very important. Membranes, insulation, vapor barriers and slope materials are needed. All materials must conform to quality standards and must be purchased from certified vendors.
It is also important to correctly estimate the amount of material. Provision of additional material is also kept. The material is stored in a safe place. All tools and equipment are also kept ready. The material’s warranty cards and certificates are kept safe. The quality of the material is checked by specialists. Special covers are provided to protect the material from the weather. All materials are also insured.
3. Preparation of the existing surface
The old surface is cleaned and levelled. Any kind of cracks or malfunctions are repaired. The surface is freed from dust and debris. This work is done with special tools and techniques.
Areas with water logging on the surface are identified. The slope is examined. Minor repairs are carried out if needed. The surface is allowed to dry completely. The strength of the surface is checked with special equipment. Special techniques are used to remove the old coating. Every corner and edge of the surface is cleaned. Special arrangements are made to prevent dust while working.
4. Installation of vapor barrier
The vapor barrier layer protects the roof from moisture. This layer is evenly laid out over the entire surface. The joints of the layer are sealed. Special care is taken that air or moisture does not penetrate from anywhere.
This layer also combines well with the walls. Special sealing is carried out around the vent pipes and other excretions. Special tapes and sealants are used in this work. The thickness of the vapor resistor is kept the same everywhere. Particular attention is paid to the temperature during the installation of this layer. Special care is taken not to form air bubbles. Its quality is checked after installation.
5. Installation of insulation layer
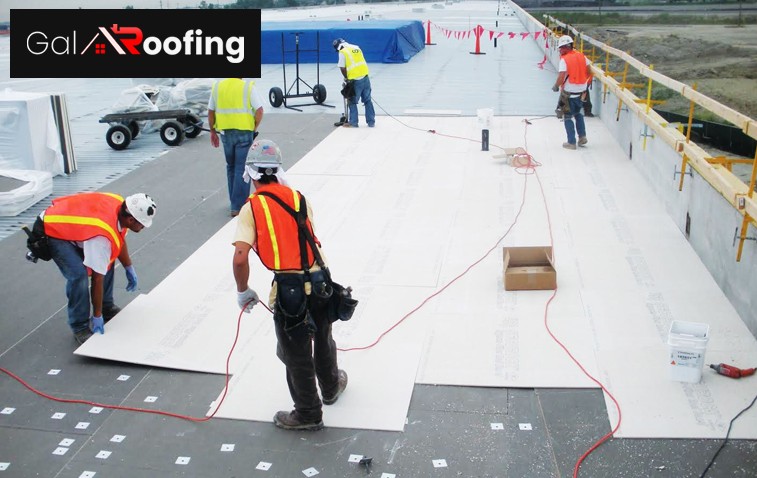
The insulation layer protects against heat and cold. The insulation board is laid out in an orderly manner. The spaces between the boards are carefully filled. The thickness of the insulation is decided in accordance with the standards of the building.
The insulation is firmly fixed. Special arrangements are made to protect against air pressure. A protective layer is also applied on top of the insulation. All joints and edges are thoroughly examined. The insulation material is kept protected from moisture. The joints of the insulation board are sealed with special tape. Special technology is used to prevent thermal bridges. The effectiveness of the insulation is checked with a thermal camera.
6. Slope and drainage
The right slope is made for the flow of water on the roof. Drains and pipes are installed. The slope material is laid evenly. Areas with water logging are especially cured.
Adequate holes and pipes are installed for drainage. The sealing of these holes is done very carefully. Emergency overflows are also managed. Regular checks of the evacuation system are planned. The capacity of drains is assessed by special calculations. Mesh is installed to protect against leaves and debris. Special access is made for cleaning the drainage system. Arrangements for rainwater harvesting are also made.
7. Membrane Installation
Membrane is the main protective layer of the roof. It is laid out very carefully. The joints of the membrane are sealed with hot air or chemicals. Particular attention is paid to the edges and corners.
The membrane is mounted to a height along the walls. Sealing of all holes and entry points is carried out. The surface of the membrane is examined. Any malfunction is corrected immediately. Safety bandages are installed to prevent walking over the membrane. Special care is taken of the thickness of the membrane. The weather forecast is observed during installation. Waterproofing of the membrane is checked with special equipment.

8. Security Layer and Finishing
The final protection layer makes the roof stronger. This layer is applied to protect against UV rays. The surface is made smooth and uniform. All joints and edges are finally examined.
Walkways are made on the roof. Safety railings and other safety devices are installed. The roof is cleaned. All documents are prepared for roof inspection. A secure access road is made for maintenance on the roof. Electrical wires and pipes are covered in a secure manner. Markings and directions are placed on the roof surface. Detailed manual is prepared for maintenance. Installation of a flat roof is a complex process in which every step is important. With the help of the right planning, proper materials, and skilled craftsmen, this work can be successfully accomplished. Regular checking and maintenance keeps the roof working well for a long time.